
I'm finally back from paternity leave and I had quite a blast messing around with a few Rust libraries during my time off in an attempt to build a website (web app?) going back to basics. I'm somewhat JS'd out as of late and was looking for some way to integrate htmx with templates in a similar vein to Go's html templates. I was pleasantly surprised at how easily I was able to duct tape axum's static file serving leveraging askama as a templating engine of sorts.
Coupled with htmx and Tailwind, I was able to find a workflow for site building using the tools I wanted, with the best part being entirely JS-free (on the surface, at least). I should preface this as not an advertisement for JS's demise, but simply an alternative approach to the development of Rust-backed web apps.
The stack
To kick things off, let's run through the bits we'll utilize to build a relatively straightforward application that serves static HTML but with reactivity powered by htmx. Our sandbox will look something like:
- Rust (for obvious reasons)
- Axum for serving static assets and powering the backend API
- Askama for HTML templating - think shared layouts, scripts, CSS, etc.
- htmx for reactivity on the UI
- Tailwind, because my brain is too smooth now to do CSS myself
RAAHT-stack? THARA? Not sure, gonna need to workshop the acronym a bit.
Getting started
Let's start by spinning up a new Rust binary:
$ cargo new --bin with-axum-htmx-askama && cd with-axum-htmx-askama
     Created binary (application) `with-axum-htmx-askama` package
Next, let's bring in the stuff we'll need to start building,
$ cargo add askama # our templating engine
$ cargo add axum # our web/file server
$ cargo add tokio --features full # async runtime

# let's add tracing for sanity
$ cargo add tracing
$ cargo add tracing-subscriber --features env-filter

# finally, let's add tower to utilize the file serving capabilities
$ cargo add tower
$ cargo add tower-http --features fs
Okay, got our dependencies installed, now let's scaffold out main.rs with a basic router and tracing setup:
use tracing::info;
use tracing_subscriber::{layer::SubscriberExt, util::SubscriberInitExt};

#[tokio::main]
async fn main() {
    tracing_subscriber::registry()
        .with(
            tracing_subscriber::EnvFilter::try_from_default_env()
                .unwrap_or_else(|_| "with_axum_htmx_askama=debug".into()),
        )
        .with(tracing_subscriber::fmt::layer())
        .init();

    info!("hello, web server!");
}
And running a quick sanity check:
$ cargo run
# things compiling...
2023-06-13T06:21:03.461354Z  INFO with_axum_htmx_askama: hello, web server!
Sweet, we're up and running with logging! Before we jump into our router, we should probably figure out what exactly
we'll be serving.
For our templates, we'll tap into askama to help axum route endpoints to serve static HTML. Askama defaults to looking
for templates
in a /templates directory at the project root, let's add that now with a bit of markup:
templates/hello.html
<h1>Howdy!</h1>
And back in main.rs, let's add an axum route to serve this file:
use anyhow::Context;
use askama::Template;
use axum::{
    http::StatusCode,
    response::{Html, IntoResponse, Response},
    routing::get,
    Router,
};
use tracing::info;
use tracing_subscriber::{layer::SubscriberExt, util::SubscriberInitExt};

#[tokio::main]
async fn main() -> anyhow::Result<()> {
    tracing_subscriber::registry()
        .with(
            tracing_subscriber::EnvFilter::try_from_default_env()
                .unwrap_or_else(|_| "with_axum_htmx_askama=debug".into()),
        )
        .with(tracing_subscriber::fmt::layer())
        .init();

    info!("initializing router...");

    let router = Router::new().route("/", get(hello));
    let port = 8000_u16;
    let addr = std::net::SocketAddr::from(([0, 0, 0, 0], port));

    info!("router initialized, now listening on port {}", port);

    axum::Server::bind(&addr)
        .serve(router.into_make_service())
        .await
        .context("error while starting server")?;

    Ok(())
}

async fn hello() -> impl IntoResponse {
    let template = HelloTemplate {};
    HtmlTemplate(template)
}

#[derive(Template)]
#[template(path = "hello.html")]
struct HelloTemplate;

/// A wrapper type that we'll use to encapsulate HTML parsed by askama into valid HTML for axum to serve.
struct HtmlTemplate<T>(T);

/// Allows us to convert Askama HTML templates into valid HTML for axum to serve in the response.
impl<T> IntoResponse for HtmlTemplate<T>
    where
        T: Template,
{
    fn into_response(self) -> Response {
        // Attempt to render the template with askama
        match self.0.render() {
            // If we're able to successfully parse and aggregate the template, serve it
            Ok(html) => Html(html).into_response(),
            // If we're not, return an error or some bit of fallback HTML
            Err(err) => (
                StatusCode::INTERNAL_SERVER_ERROR,
                format!("Failed to render template. Error: {}", err),
            )
                .into_response(),
        }
    }
}
Okay, so we fleshed out our router quite a bit and added a few types to help us serve the HTML askama will stitch together for us (more on that in a bit).
We have a simple base route that serves the hello.html file we have in our templates/ directory,
though askama is also able to pass render-able data to these HTML files in a template-like fashion.
Luckily for us, askama provides the #[template(path = "path/to/html")] macro, assuming your HTML
files are in the templates/ directory. This is also configurable, but the defaults will do for now. Running the server
locally:
$ cargo run
    # stuff compiling...
2023-06-13T06:47:23.018937Z  INFO with_axum_htmx_askama: initializing router...
2023-06-13T06:47:23.019361Z  INFO with_axum_htmx_askama: router initialized, now listening on port 8000
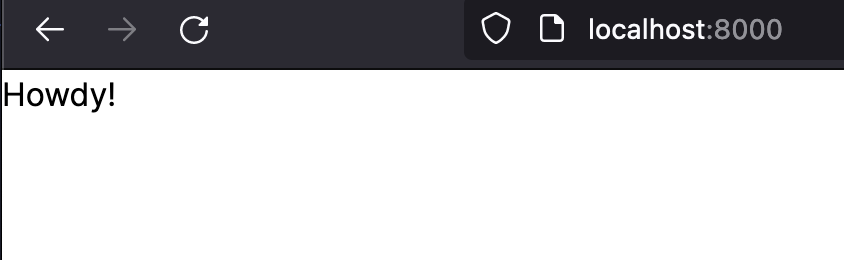
We have some basic logs that reassure successful startup, and if we navigate to localhost:8000 in our favorite
browser:

We've got ourselves a landing page!
Integrating Tailwind
Now, this isn't the most exciting landing page, so let's spruce this up a bit to make it look like it's not from 1996. I'm gonna be using Tailwind mostly because I'm a CSS sellout and love really, really, really long class names on my elements.
Tailwind helpfully provides a plethora of integration guides for any number of tech stacks. Unfortunately, Rust-based static file serving with axum isn't on the list. The good news, however, is that we can rely on the most basic of Tailwind strategies to bring in some sweet styles.
If you're not familiar with Tailwind, take a look at the docs and the philosophy behind its design system. There are some pretty neat optimizations we'll tap into, and one of the reasons I love Tailwind is for the utility tree-shaking/minification of CSS that it'll do to ensure our bundled styles are as small as possible. No one needs 70 MB of CSS shipped to their browser (if you're reading this, Rob, you know what you did).
We're going to rely on a few npm packages, so we'll need to spin up a simple package.json file to help us bring in
Tailwind and eventually Prettier to make things look nice on our templates. Using pnpm:
$ pnpm init
Wrote to ~/with-axum-htmx-askama/package.json

{
  "name": "with-axum-htmx-askama",
  "version": "1.0.0",
  "description": "",
  "main": "index.js",
  "scripts": {
    "test": "echo \"Error: no test specified\" && exit 1"
  },
  "keywords": [],
  "author": "",
  "license": "ISC"
}
With our package manifest in place, let's add a few things to it. I'm using pnpm, though npm and yarn will suffice:
pnpm add -D tailwindcss prettier prettier-plugin-tailwindcss
And let's clean up package.json to remove the things we won't need:
{
  "name": "with-axum-htmx-askama",
  "version": "1.0.0",
  "license": "ISC",
  "devDependencies": {
    "prettier": "^2.8.8",
    "prettier-plugin-tailwindcss": "^0.3.0",
    "tailwindcss": "^3.3.2"
  }
}
I'm using Prettier to keep things nicely formatted, so I'll add a quick script to keep our templates tidy:
{
  "name": "with-axum-htmx-askama",
  "version": "1.0.0",
  "license": "ISC",
  "scripts": {
    "format": "prettier --write --ignore-unknown ."
  },
  "devDependencies": {
    "prettier": "^2.8.8",
    "prettier-plugin-tailwindcss": "^0.3.0",
    "tailwindcss": "^3.3.2"
  }
}
Now we can format from the terminal to our heart's content:
$ pnpm format

package.json 340ms
pnpm-lock.yaml 159ms
templates/hello.html 371ms
Let's spice up our template now. Back in hello.html, let's flesh this page out a bit more
to be more of a fully functional HTML file we'd expect to serve to the browser, including assets:
<!doctype html>
<html lang="en">
<head>
    <link href="/assets/main.css" rel="stylesheet"/>
    <link href="https://rsms.me/inter/inter.css" rel="stylesheet"/>
</head>
<body>
<h1>Howdy!</h1>
</body>
</html>
I've added two links to CSS files, one for the Inter font... because why not.

The other link is to a CSS file that doesn't exist (yet). This CSS file will contain the compiled output Tailwind's
CLI spits out for us after scanning
the HTML files in our /templates directory and determining which utility
classes are not needed helping us reduce the bundled CSS file size that will ship to our users' browsers. Pretty neat,
huh?
Now as I mentioned, this will be a file that is generated and not necessarily included by default. First, we need to
add a CSS file Tailwind
will use to generate the utilities our HTML templates will use. Let's create a styles/tailwind.css file:
styles/tailwind.css
@tailwind base;
@tailwind components;
@tailwind utilities;
We'll use the CLI to read this file as input, scan which utilities are being used by our HTML, and output the optimized stylesheet to be served. Let's run our first pass:
$ pnpm dlx tailwindcss -i styles/tailwind.css -o assets/main.css --watch

Rebuilding...

warn - No utility classes were detected in your source files. If this is unexpected, double-check the `content` option in your Tailwind CSS configuration.
warn - https://tailwindcss.com/docs/content-configuration

Done in 74ms.
Nice! Though not very exciting, as Tailwind didn't detect any utility classes to purge as we don't have a configuration file for it to read pointing to the markup. Let's add one:
$ pnpm dlx tailwindcss init

Created Tailwind CSS config file: tailwind.config.js
And let's adjust the tailwind.config.js file that was generated for us:
const {fontFamily} = require('tailwindcss/defaultTheme');

/** @type {import('tailwindcss').Config} */
module.exports = {
    content: ['./templates/*.html'],
    theme: {
        extend: {
            fontFamily: {
                sans: ['Inter var', ...fontFamily.sans],
            },
        },
    },
};
I'm also going to rename the extension to .cjs to make eslint happy.
If you're unfamiliar with Tailwind, essentially this is just a configuration file telling Tailwind where to look for
utility classes
for treeshaking ones we're not using. We're also overriding the default sans font with the Inter font so we can look
like a legit Series B startup
on our landing page.
Now if we run the Tailwind CLI again, we'll get the same message. If we spin up our server,
nothing has changed either. One last step: we need to tell axum to serve our assets/ directory so our compiled
Tailwind CSS file is available for our template to use.
Back in main.rs, let's a tower service route to serve everything under the assets/ folder:
use anyhow::Context;
use askama::Template;
use axum::{
    http::StatusCode,
    response::{Html, IntoResponse, Response},
    routing::get,
    Router,
};
use tower_http::services::ServeDir;
use tracing::info;
use tracing_subscriber::{layer::SubscriberExt, util::SubscriberInitExt};

#[tokio::main]
async fn main() -> anyhow::Result<()> {
    // Setup stuff...

    // We could also read our port in from the environment as well
    let assets_path = std::env::current_dir().unwrap();
    let port = 8000_u16;
    let addr = std::net::SocketAddr::from(([0, 0, 0, 0], port));
    let router = Router::new().route("/", get(hello)).nest_service(
        "/assets",
        ServeDir::new(format!("{}/assets", assets_path.to_str().unwrap())),
    );

    // Other stuff...
}

// Other stuff...
The key here is the assets_path and the chain call to .nest_service(), telling
axum to serve an /assets route with all the files underneath that directory locally. Now if we start our server, we
should see our Howdy! text looks a bit different:
We've got Inter font! Let's spice this up even more with some colored text. In our hello.html template, let's add a
text color class:
<!doctype html>
<html lang="en">
<head>
    <link href="/assets/main.css" rel="stylesheet"/>
    <link href="https://rsms.me/inter/inter.css" rel="stylesheet"/>
</head>
<body>
<h1 class="text-green-500">Howdy!</h1>
</body>
</html>
I've been running my processes in the back, both the Tailwind CLI and our axum server with the help of cargo-watch, so any changes I make to our Rust code or HTML templates will automatically be detected. Refreshing the page, we should see green text. Sweet!
Extending templates
Our current template generation is missing one key piece in template
inheritance. If we were to add additional axum routes that
served HTML, we would need to include <head> tags for each file. Not a great developer experience, as we want to have
templates extend a base markup file that includes all of our common head metadata like links, tags, etc.
Luckily, askama has us covered with what we
need. Using template inheritance, we can define base template layouts that our individual route templates will extend.
To make
life easier so we can avoid having to write the same boilerplate HTML in each template we'll serve, let's create
a base.html file:
templates/base.html
<!doctype html>
<html lang="en">
<head>
    <link href="/assets/main.css" rel="stylesheet"/>
    <link href="https://rsms.me/inter/inter.css" rel="stylesheet"/>
    <!-- Allow any inheriting page to set it's own title -->
    <title>{% block title %}{{ title }}{% endblock %}</title>

    <!-- Allow any inheriting page to extend head with additional assets -->
    {% block head %}{% endblock %}
</head>
<body>
<div id="content">
    <!-- Inheriting pages will have their content rendered here, similar to app root in React, Angular, etc. -->
    {% block content %}{% endblock %}
</div>
</body>
</html>
With our base template in place, let's clean up our hello.html file a bit:
templates/hello.html
<!-- prettier-ignore -->
{% extends "base.html" %}

{% block title %}Hello!{% endblock %}

{% block content %}
<h1 class="text-green-500">Howdy!</h1>
{% endblock %}
Note the ignore statement for prettier to skip formatting this file for now - default prettier doesn't do a great job at formatting templated HTML files but I'm sure there's a plugin out there to include to fix this that I'm simply too lazy to search for.
Since we've kept our server running and have Tailwind compiling output assets in watch mode for us, we should be able
to navigate back to localhost:8000 and notice there's no change to our page, still displaying the green "Howdy!" text.
This is exactly what we expect, though we now have base templates that each of our pages can include!
To prove that we've now got a nice extendable page model, let's add another page with a link on our home page that
routes
to this new page that I'll cleverly name /another-page with its even more cleverly associated
template another-page.html:
templates/another-page.html
<!-- prettier-ignore -->
{% extends "base.html" %}

{% block title %}Another page!{% endblock %}

{% block content %}
<h1 class="font-bold text-indigo-500">Another page</h1>
{% endblock %}
Let's add an axum route to serve this template with users hit the /another-page frontend route:
main.rs
// Imports and such...

#[tokio::main]
async fn main() -> anyhow::Result<()> {
    // Other stuff...

    let router = Router::new()
        .route("/", get(hello))
        .route("/another-page", get(another_page))
        .nest_service(
            "/assets",
            ServeDir::new(format!("{}/assets", assets_path.to_str().unwrap())),
        );

    // More stuff...
}

// Other templates...

async fn another_page() -> impl IntoResponse {
    let template = AnotherPageTemplate {};
    HtmlTemplate(template)
}

#[derive(Template)]
#[template(path = "another-page.html")]
struct AnotherPageTemplate;
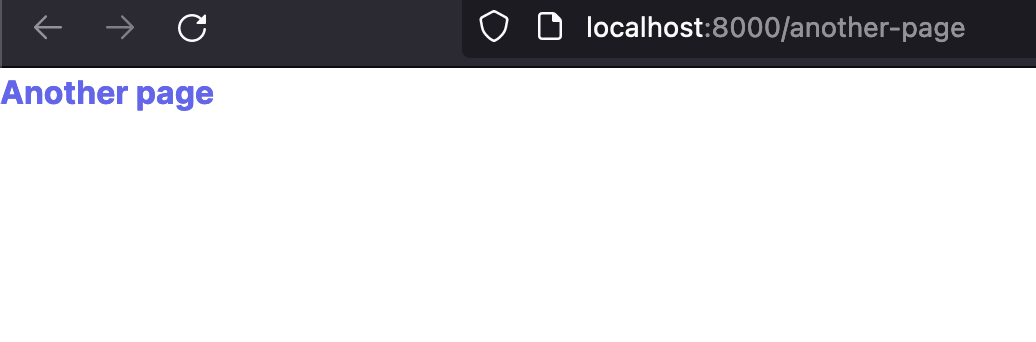
If we manually route to this page, we should it in the browser:
As another sanity check, take a look at the CSS Tailwind is outputting in our assets/ directory, namely taking a look
at the tail end (no pun intended) of the file:
assets/main.css
/
/
More classes... .font-bold {
    font-weight: 700;
}

.text-green-500 {
    --tw-text-opacity: 1;
    color: rgb(34 197 94 / var(--tw-text-opacity));
}

.text-indigo-500 {
    --tw-text-opacity: 1;
    color: rgb(99 102 241 / var(--tw-text-opacity));
}
Tailwind is only including the utilities it sees in our template files, namely the colors we've included and the bold
font we've slapped on the text of our /another-page route. Pretty neat, huh?
Let's spice our templates up with some routes. In our hello.html let's add a link:
<!-- prettier-ignore -->
{% extends "base.html" %}

{% block title %}Hello!{% endblock %}

{% block content %}
<div class="inline-flex flex-row space-x-2">
    <h1 class="text-green-500">Howdy!</h1>
    <a
            href="/another-page"
            class="text-indigo-500 underline hover:text-indigo-300"
    >Another page</a
    >
</div>
{% endblock %}
Nothing special going on here, just spicing up the look of our link and adding some padding between the two elements. Refreshing the home page, we should see a new link pop up:
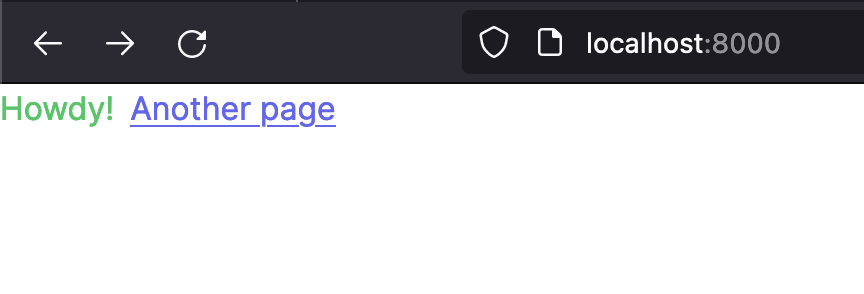
and clicking the link, we route to our newly added /another-page page! More importantly, take note of how we're only
including
the relevant markup for each page. The power of templates compels you!
Bringing in the functionality
Okay, so we have a web server serving static HTML, good-looking assets with the help of Tailwind, and an extendable page model... let's fit the last piece of the web dev DX puzzle by bringing interactive functionality to our pages with the help of htmx. With htmx, we can do all the JavaScript-y things we would normally see as first-class functionality in a modern frontend framework, but in the comfort of our HTML. No need to submit form data to our backend and reload the page between transitions, htmx will do the work for us!
Since htmx brings modern UI goodness to standard hypertext, we don't need to worry about writing form handlers, fetching data via AJAX, etc. While htmx brings a lot to the plate, let's start small and simply grab some data from an API and replace some elements on the screen with it.
Even better, htmx is small in size and easily pluggable into our current setup. Let's bring it in as a <script> tag
to our base layout so all pages have access to it:
templates/base.html
<!doctype html>
<html lang="en">
<head>
    <link href="/assets/main.css" rel="stylesheet"/>
    <link href="https://rsms.me/inter/inter.css" rel="stylesheet"/>
    <!-- Allow any inheriting page to set it's own title -->
    <title>{% block title %}{{ title }}{% endblock %}</title>

    <!-- htmx from the unpkg CDN - your mileage may vary -->
    <script src="https://unpkg.com/htmx.org@1.9.2"></script>

    <!-- Allow any inheriting page to extend head with additional assets -->
    {% block head %}{% endblock %}
</head>
<body>
<div id="content">
    <!-- Inheriting pages will have their content rendered here, similar to app root in React, Angular, etc. -->
    {% block content %}{% endblock %}
</div>
</body>
</html>
With htmx included, we'll add a button on our homepage that will ping one of our server endpoints for some data. We don't have purely backend endpoints yet - all of our axum routes serve HTML. Let's mount a subrouter that will include endpoints that return some JSON data for our UI to consume.
To note, we'll load htmx from unpkg, a handy npm package CDN. Keep in mind you'll probably want to fetch this packages during production deployments to avoid unpkg outages (which happens more than I'm sure the maintainers care to admit).
If we refresh the landing page, again assuming were still using cargo-watch to run the server and crack open the network tab, we should the htmx JS loaded by the browser. Before we get to our markup, let's add an axum route that returns some text for us to display:
main.rs
#[tokio::main]
async fn main() -> anyhow::Result<()> {
    // Other stuff...
    let api_router = Router::new().route("/hello", get(hello_from_the_server));

    let router = Router::new()
        .nest("/api", api_router)
        .route("/", get(hello))
        .route("/another-page", get(another_page))
        .nest_service(
            "/assets",
            ServeDir::new(format!("{}/assets", assets_path.to_str().unwrap())),
        );

    // More stuff...
}

// Other handlers...

async fn hello_from_the_server() -> &'static str {
    "Hello!"
}
We've effectively added a subrouter underneath the parent /api route. The example here is pretty trivial, and we'll
spice things up here shortly. With our server now able to serve data at specific
endpoints, let's do a quick sanity check. In another terminal:
$ curl -l https://localhost:8000/api/hello
Hello!%
We're serving data, now let's wire this up to a button click. On our homepage, let's add a spruced up Tailwind button:
templates/hello.html
<!-- prettier-ignore -->
{% extends "base.html" %}

{% block title %}Hello!{% endblock %}

{% block content %}
<div class="inline-flex flex-row space-x-2 px-8 py-4">
    <h1 class="text-green-500">Howdy!</h1>
    <a
            href="/another-page"
            class="text-indigo-500 underline hover:text-indigo-300"
    >Another page</a
    >
    <button
            type="button"
            hx-get="/api/hello"
            hx-swap="innerHtml"
            class="rounded-md bg-indigo-600 px-2.5 py-1.5 text-sm font-semibold text-white shadow-sm hover:bg-indigo-500 focus-visible:outline focus-visible:outline-2 focus-visible:outline-offset-2 focus-visible:outline-indigo-600"
    >
        Say hello
    </button>
</div>
{% endblock %}
I've added a button with the hx-get htmx directive to signal that when this button is clicked, send a GET
to /api/hello at the current running domain and hx-swap the inner HTML (the button text) with whatever comes back. A
quick page refresh and we should see our updated home route:
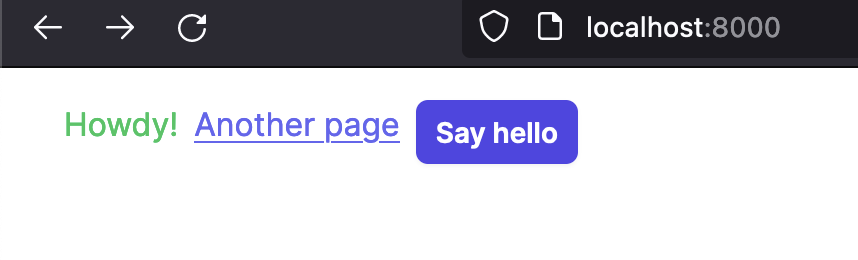
I'm a bit claustrophobic, so I added some padding to give our UI elements some room to breathe. With the network tab
open, if we click the button, we see some magic happen - a GET is fired and our button text is updated with the Hello!
text returned from the server. Sweet!
Okay... static text returned from the server is fascinating and all, but let's make something a bit more functional. With htmx, we can define actions that return HTML and dynamically swap and replace elements on the UI with the retrieved markup (flashback to my JEE days). Let's spit some row data back to the homepage from the server using an endpoint that returns another template. Let's add a cool Tailwind'y form so revolutionary in terms of data-driven APIs, it may just get me one of those mythical FAANG jobs everyone keeps talking about.
Tailwind has some pretty neat utilities, and I'm gonna go ahead and bring in the forms package to help create some nice looking inputs:
$ pnpm add @tailwindcss/forms
Once that's installed, let's update our tailwind.config.cjs file:
const {fontFamily} = require('tailwindcss/defaultTheme');

/** @type {import('tailwindcss').Config} */
module.exports = {
    content: ['./templates/*.html'],
    theme: {
        extend: {
            fontFamily: {
                sans: ['Inter var', ...fontFamily.sans],
            },
        },
    },
    plugins: [require('@tailwindcss/forms')],
};
Now that our utility has been added, let's create a todo-form.html file in our templates/ directory with a good
looking form input:
<form class="max-w-md">
    <label for="todo" class="block text-sm font-medium leading-6 text-gray-900"
    >Todo</label
    >
    <div class="mt-2 inline-flex flex-row space-x-2">
        <input
                type="text"
                name="todo"
                id="todo"
                class="block w-full rounded-md border-0 py-1.5 text-gray-900 shadow-sm ring-1 ring-inset ring-gray-300 placeholder:text-gray-400 focus:ring-2 focus:ring-inset focus:ring-indigo-600 sm:text-sm sm:leading-6"
                placeholder="Replace frontend with htmx"
        />
        <button
                type="button"
                class="rounded-md bg-indigo-600 px-2.5 py-1.5 text-sm font-semibold text-white shadow-sm hover:bg-indigo-500 focus-visible:outline focus-visible:outline-2 focus-visible:outline-offset-2 focus-visible:outline-indigo-600"
        >
            Add
        </button>
    </div>
</form>
Now we're not extending the base layout since we'll take the lazy way out and simply add it to our home page. Again,
askama
provides a jinja-like include tag we can throw on our hello.html template:
<!-- prettier-ignore -->
{% extends "base.html" %}

{% block title %}Hello!{% endblock %}

{% block content %}
<div class="inline-flex flex-row space-x-2">
    <h1 class="text-green-500">Howdy!</h1>
    <a
            href="/another-page"
            class="text-indigo-500 underline hover:text-indigo-300"
    >Another page</a
    >
    <button
            type="button"
            hx-get="/api/hello"
            hx-swap="innerHtml"
            class="rounded-md bg-indigo-600 px-2.5 py-1.5 text-sm font-semibold text-white shadow-sm hover:bg-indigo-500 focus-visible:outline focus-visible:outline-2 focus-visible:outline-offset-2 focus-visible:outline-indigo-600"
    >
        Say hello
    </button>
</div>

{% include "todo-form.html" %} {% endblock %}
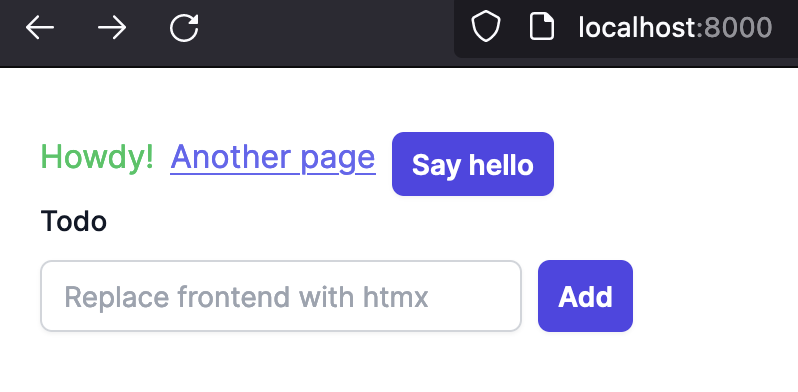
A quick page refresh and our home route now includes a single input form and button:
As we add todos, we'll want them to appear beneath the input box and keep appending to it as we add more. We're not exactly building the next Facebook, so we can keep our implementation simple. We need some way to keep track of todos, and we'll want to manage that with our axum server so we can maintain a list of todos that will act as our persistence mechanism. Let's add some state to hold the todo information:
main.rs
struct AppState {
    todos: Mutex<Vec<String>>,
}

#[tokio::main]
async fn main() -> anyhow::Result<()> {
    // Other stuff...

    let app_state = Arc::new(AppState {
        todos: Mutex::new(vec![]),
    });

    // We could also read our port in from the environment as well
    let assets_path = std::env::current_dir().unwrap();
    let port = 8000_u16;
    let addr = std::net::SocketAddr::from(([0, 0, 0, 0], port));

    let api_router = Router::new()
        .route("/hello", get(hello_from_the_server))
        .route("/todos", post(add_todo))
        .with_state(app_state);

    // Other stuff...
}
We add AppState that holds a Vec of todos as strings locked behind a Mutex. Now, this is not exactly a PSA for
proper
state management with axum - we're cutting a lot of corners here to keep things streamlined. Because AppState can be
shared
across threads thanks to being wrapped with Arc, we'll need to do our due diligence of locking the todo list before
attempting
to add more todays. With our state added as an extension to our API router, let's add the add_todo route to do just
that:
#[derive(Template)]
#[template(path = "todo-list.html")]
struct TodoList {
    todos: Vec<String>,
}

async fn add_todo(
    State(state): State<Arc<AppState>>,
    Form(todo): Form<TodoRequest>,
) -> impl IntoResponse {
    let mut lock = state.todos.lock().unwrap();
    lock.push(todo.todo);

    let template = TodoList {
        todos: lock.clone(),
    };

    HtmlTemplate(template)
}
I've also added a todo-list.html template that will use the todo data we've acquired behind our lock. Let's add that
to our templates/ directory:
{% for todo in todos %}
<p class="text-lg">{{ todo }}</p>
{% endfor %}
Using askama's templating, we pass in the todos list and iterate over them generating a <p> tag for each todo. We'll
need
to paint the HTML returned by our add_todo route, so let's append it to the end of our todo-form.html markup:
<form
        hx-post="/api/todos"
        hx-target="#todos"
        hx-swap="innerHTML"
        class="max-w-md"
>
    <label for="todo" class="block text-sm font-medium leading-6 text-gray-900"
    >Todo</label
    >
    <div class="mt-2 inline-flex flex-row space-x-2">
        <input
                type="text"
                name="todo"
                id="todo"
                class="block w-full rounded-md border-0 py-1.5 text-gray-900 shadow-sm ring-1 ring-inset ring-gray-300 placeholder:text-gray-400 focus:ring-2 focus:ring-inset focus:ring-indigo-600 sm:text-sm sm:leading-6"
                placeholder="Replace frontend with htmx"
        />
        <button
                type="submit"
                class="rounded-md bg-indigo-600 px-2.5 py-1.5 text-sm font-semibold text-white shadow-sm hover:bg-indigo-500 focus-visible:outline focus-visible:outline-2 focus-visible:outline-offset-2 focus-visible:outline-indigo-600"
        >
            Add
        </button>
    </div>
</form>
<div id="todos"/>
I've sprinkled in some htmx directives with hx-post, hx-target, and hx-swap as well:
hx-posttells our form submission where to send the form data as a POST request toohx-targetis the element we want to mutate after we get a responsehx-swap="innerHTML"means we'll drop the hypertext returned from ouradd_todohandler as a child element of our<div id="todos" />tag
With our Tailwind and axum server processes still running in watch mode, we should be good to start trying things out now. With our homepage refreshed, we can start adding todos. I've expanded the network while we create a few todos to show off htmx making form requests for us and returning the askama templated hypertext back to us. Badda bing, badda boom, and we've got some todos!
Wrapping up
Web dev (for me, at least) just got a lot more fun thanks to Rust, askama, axum and htmx. While our sample here is a bit light on functionality, I've written a more fleshed out version available on GitHub that includes a more opinionated approach to organizing templates, page routes, and ready to host on a provider like Fly with a ready-to-go Dockerfile.
Until next time, friends!