Memes aside, if you've been following along with our flux-ified Blazor project, you may have noticed the plethora of initial, success, and failure action types. While this may seem like overkill to some, by creating this separation of concern between action types, we ensure each action has a single responsibility in the flux workflow. If (read: when) our business requirements change that cause us to modify existing actions, we can do so without fear of unintentionally breaking another workflow that might reuse the same action. It's like I always say, "when in doubt, create a new action."
Continuing where we left off
In our last post, we discussed what the flux design pattern is, what problems it seeks to solve, and how to integrate it with Blazor using the Fluxor library. So far, we've created two action workflows to interact with the JSON Placeholder API: a todo list retrieve workflow and a todo retrieval by ID workflow. With the help of a few services and effects, we successfully implemented the R of our CRUD operations using actions, reducers, and our central application store to allow our components to simply get only the state features they care about and display them on the page. In this (hopefully shorter) post, we'll do a bit of service refactoring and add a few more CRUD operations to give us a functioning application that'll allow us to interface with the todos from the JSON Placeholder API.
Refactoring to typed HTTP services
To kick things off, let's start by refactoring how we've been calling the API. So far, we've been injecting
an HttpClient instance directly into our effects with the help of the DI container from
the Microsoft.Extensions.DependencyInjection library. A more robust, unit test-able approach would be to utilize a
centralized service that contains the HttpClient instance injected into it so that we can configure a single client
instance to our liking (attach headers, set base paths, etc.) and funnel all external network calls into a single place,
rather than have HttpClients spread throughout all of our flux effects. In our Services folder at the root of our
project, let's add a file named JsonPlaceholderApiService.cs with the following code:
JsonPlaceholderApiService.cs
using Microsoft.Extensions.Logging;
using System.Net.Http;
using System.Net.Http.Json;
using System.Threading.Tasks;

namespace StateManagementWithFluxor.Services
{
    public class JsonPlaceholderApiService
    {
        private readonly ILogger<JsonPlaceholderApiService> _logger;
        private readonly HttpClient _httpClient;

        public JsonPlaceholderApiService(ILogger<JsonPlaceholderApiService> logger, HttpClient httpClient) =>
            (_logger, _httpClient) = (logger, httpClient);

        public Task<TResponse> GetAsync<TResponse>(string path)
        {
            _logger.LogInformation($"GET: Retrieving resource of type {typeof(TResponse).Name}");
            return _httpClient.GetFromJsonAsync<TResponse>(path);
        }

        public Task<HttpResponseMessage> PostAsync<TBody>(string path, TBody body)
        {
            _logger.LogInformation($"POST: Creating resource of type {typeof(TBody).Name}");
            return _httpClient.PostAsJsonAsync(path, body);
        }

        public Task<HttpResponseMessage> PutAsync<TBody>(string path, TBody body)
        {
            _logger.LogInformation($"PUT: Updating resource of type {typeof(TBody).Name}");
            return _httpClient.PutAsJsonAsync(path, body);
        }

        public Task<HttpResponseMessage> DeleteAsync(string path)
        {
            _logger.LogInformation("DELETE: Removing resource");
            return _httpClient.DeleteAsync(path);
        }
    }
}
With our centralized HTTP service in place, we've effectively created
a typed client that we
can configure within the DI container to inject into our effects, with a configured HTTP client service wired up at
runtime. Back in our Program.cs, we'll need to add a service reference to our JsonPlaceholderApiService, but before
doing so, let's add a package reference to the Microsoft.Extensions.Http NuGet package so that we can properly
configure the HTTP client that will be injected into this service. I'm using Visual Studio's package manager to add the
reference to our project, but feel free to use the command line (dotnet add package Microsoft.Extensions.Http), or the
Package Manager console (Install-Package Microsoft.Extensions.Http). Once we've successfully added the package, let's
add the following code to Program.cs:
Program.cs
using System;
using System.Threading.Tasks;
using Microsoft.AspNetCore.Components.WebAssembly.Hosting;
using Microsoft.Extensions.DependencyInjection;
using Fluxor;
using System.Reflection;
using StateManagementWithFluxor.Services;
using System.Net.Mime;

namespace StateManagementWithFluxor
{
    public class Program
    {
        public static async Task Main(string[] args)
        {
            var builder = WebAssemblyHostBuilder.CreateDefault(args);
            builder.RootComponents.Add<App>("app");

            // Add Fluxor
            builder.Services.AddFluxor(options =>
            {
                options.ScanAssemblies(Assembly.GetExecutingAssembly());
                options.UseReduxDevTools();
            });

            // Add custom application services
            builder.Services.AddScoped<StateFacade>();
            builder.Services.AddHttpClient<JsonPlaceholderApiService>(client =>
            {
                client.DefaultRequestHeaders.Add("Content-Control", $"{MediaTypeNames.Application.Json}; charset=utf-8");
                client.BaseAddress = new Uri("https://jsonplaceholder.typicode.com");
            });

            await builder.Build().RunAsync();
        }
    }
}
From the above, we can see that we've added the line builder.Services.AddHttpClient<JsonPlaceholderApiService>
configuring the HttpClient instance that will be injected into the API service for us at runtime. Every time
a JsonPlaceholderApiService instance is requested at runtime within our effects, the DI container will inject a
configured HttpClient instance with the base address we've pointed to here and the default headers on each request.
With our API service wired up, let's go ahead and add some markup to allow users to create todos. When creating a todo
and sending the corresponding POST request to JSON Placeholder API, we won't actually be creating a resource on the
server (we'll see the consequences of this later).
The Placeholder API is simply just that - a dummy API that acts as a placeholder for realtime requests and responses.
Our create request will send back a 201 with the created todo resource. We'll take that todo and simply append it to our
current list of todos and re-render the list within our Todos.razor component to reflect the addition of the newly
created todo. In a real world scenario, this isn't really something you'd want to be doing on the frontend. A better
solution, and more common in practice, would be to send a create request to a downstream server from the client, and
upon a successful status returned from the server, we'd send another request to the server to retrieve the list again
that should contain our newly created resource. There's a few reason as to why we would implement the design in this
way, but a bit irrelevant and out of scope for this post.
Let's go ahead create a Components folder at our solution root and within that directory, let's add a razor file
called CreateTodoForm.razor with the following markup:
CreateTodoForm.razor
@inherits Fluxor.Blazor.Web.Components.FluxorComponent

@using StateManagementWithFluxor.Models.Todos.Validation
@using StateManagementWithFluxor.Services

@inject StateFacade Facade

<EditForm Model="validationModel" OnValidSubmit="HandleValidSubmit">
    <DataAnnotationsValidator />
    <div class="d-flex flex-column align-items-center">
        <ValidationSummary />
    </div>

    <div class="d-flex flex-row justify-content-center">
        <div class="form-group px-2">
            <label for="create-todo-title">Title</label>
            <InputText  id="create-todo-title"  @bind-Value="validationModel.Title" class="form-control"/>
        </div>
        <div class="form-group px-2">
            <label for="create-todo-completed">User ID</label>
            <InputNumber ParsingErrorMessage="That is not a valid user ID" id="create-todo-user-id" @bind-Value="validationModel.UserId" class="form-control"/>
        </div>
        <div class="form-group px-2 mt-3 d-flex flex-column align-items-center">
            <label for="create-todo-completed">Completed?</label>
            <InputCheckbox id="create-todo-completed" @bind-Value="validationModel.Completed" class="form-check"/>
        </div>
    </div>

    <div class="pt-2 d-flex flex-row justify-content-center">
        <button class="btn btn-primary" type="submit">Create</button>
    </div>
</EditForm>


@code {

    private CreateOrUpdateTodoValidationModel validationModel = new CreateOrUpdateTodoValidationModel();

    protected override void OnInitialized()
    {
        validationModel.UserId = 1;

        base.OnInitialized();
    }

    private void HandleValidSubmit()
    {
        // We use the bang operator (!) to tell the compiler we'll know this string field will not be null
        Facade.CreateTodo(validationModel.Title!, validationModel.Completed, validationModel.UserId);
    }

}
In our CreateTodoForm.razor component, we're simply just adding a bit of form markup to allow users to input a todo
title, user ID, and the current status of the todo (done/not done). We're using Blazor's built-in EditForm to perform
field validations on our model that we'll ultimately send to the server containing the todo data, again letting these
built-in Blazor tools handle the heavy input validation lifting for us. Using the DataAnnotationsValidator
and ValidationSummary components, we're able to dynamically render validation messages when the user input does not
meet our criteria for handling form submission. Using a little Bootstrap, we'll be able to display our error messages in
a somewhat pleasant manner as well.
Notice that we've added a new model type with the CreateOrUpdateTodoValidationModel reference that will have it's
properties set as we've bound it to our EditForm using the Model attribute. Let's go ahead and add a Validation
folder underneath the Todos feature folder within our Models directory. Within the Validation folder, let's add
the CreateOrUpdateTodoValidationModel.cs class file:
CreateOrUpdateTodoValidationModel.cs
using System.ComponentModel.DataAnnotations;

namespace StateManagementWithFluxor.Models.Todos.Validation
{
    public class CreateOrUpdateTodoValidationModel
    {
        [Required(AllowEmptyStrings = false, ErrorMessage = "Your todo must have a title")]
        public string? Title { get; set; }

        [Required(ErrorMessage = "Status of this todo is required")]
        public bool Completed { get; set; }

        [Required(ErrorMessage = "User ID associated with this todo is required")]
        [Range(1, 100)]
        public int UserId { get; set; }
    }
}
Using .NET's System.ComponentModel.DataAnnotations library, we add a few Required attributes to each of the
properties, with an additional Range attribute on the UserId to enforce users stay within the 1 to 100 user ID
values. While it might seem a bit overkill to add this validation model when we could just simply bind each of the
properties to a model to be sent off to a server, we have to keep in mind that we don't want our models to
become god objects. If you've ever worked on a large enterprise codebase,
you've more than likely seen this at some point or another - API models reused across multiple endpoint request payloads
trying to fit the mold everywhere, "helper" classes that only "help" you magically break this unintentionally when
making slight changes, and the list goes on. Our request models and validation models should be responsible for one
thing, and one thing only - the CreateOrUpdateTodoValidationModel is only concerned about validating input.
Back in our CreateTodoForm.razor with the EditForm referencing our validationModel, we bind each of the properties
within the validationModel to an input tag. Luckily for us, the .NET team has provider a few nice custom input
components when dealing with EditForms within our application. We bind each of the Title, Completed, and UserId
properties to a wrapping input component in InputText, InputCheckbox, and InputNumber respectively. Adding a
few form-control Bootstrap classes and we've got a semi-decent looking form!
In our OnInitialized component lifecycle method, we initialize the user ID to 1 since the rendered markup with be
a type="number" input. We've also added another method to our StateFacade service with CreateTodo - let's go ahead
and add that to the facade:
StateFacade.cs
using Fluxor;
using Microsoft.Extensions.Logging;
using StateManagementWithFluxor.Models.Todos.Dtos;
using StateManagementWithFluxor.Store.Features.Todos.Actions.CreateTodo;


namespace StateManagementWithFluxor.Services
{
    public class StateFacade
    {
        // Previous constructor and methods...

        public void CreateTodo(string title, bool completed, int userId)
        {
            // Construct our validated todo
            var todoDto = new CreateOrUpdateTodoDto(title, completed, userId);

            _logger.LogInformation($"Issuing action to create todo [{title}] for user [{userId}]");
            _dispatcher.Dispatch(new CreateTodoAction(todoDto));
        }
    }
}
If you're curious about why we've added this "facade" service, I mention the reasons for doing so in the first post.
Our CreateTodo method simply constructs a CreateOrUpdateTodoDto immutable request model and issues
a CreateTodoAction with it as the payload. Let's add each of those classes to their respective folders:
Models/Todos/Dtos/CreateOrUpdateTodoDto.cs
namespace StateManagementWithFluxor.Models.Todos.Dtos
{
    public class CreateOrUpdateTodoDto
    {
        public CreateOrUpdateTodoDto(string title, bool completed, int userId) =>
            (Title, Completed, UserId) = (title, completed, userId);

        public string Title { get; }

        public bool Completed { get; }

        public int UserId { get; }
    }
}
Store/Features/Todos/Actions/CreateTodo/CreateTodoAction.cs
using StateManagementWithFluxor.Models.Todos.Dtos;

namespace StateManagementWithFluxor.Store.Features.Todos.Actions.CreateTodo
{
    public class CreateTodoAction
    {
        public CreateTodoAction(CreateOrUpdateTodoDto todo) =>
            Todo = todo;

        public CreateOrUpdateTodoDto Todo { get; }
    }
}
With our newly created action CreateTodoAction, let's add our success and failure actions while we're here before
creating the reducer methods that will subscribe to these actions:
CreateTodoSuccessAction.cs
using StateManagementWithFluxor.Models.Todos.Dtos;

namespace StateManagementWithFluxor.Store.Features.Todos.Actions.CreateTodo
{
    public class CreateTodoSuccessAction
    {
        public CreateTodoSuccessAction(TodoDto todo) =>
            Todo = todo;

        public TodoDto Todo { get; }
    }
}
CreateTodoFailureAction.cs
using StateManagementWithFluxor.Store.Features.Shared.Actions;

namespace StateManagementWithFluxor.Store.Features.Todos.Actions.CreateTodo
{
    public class CreateTodoFailureAction : FailureAction
    {
        public CreateTodoFailureAction(string errorMessage)
            : base(errorMessage)
        {
        }
    }
}
Recall from our previous post that we created a common FailureAction for all of our failure type actions to descend
from, allowing us to store common error properties within this shared action for all failure actions to tap into. With
our create action in place, let's add a reducer to our our Reducers directory within our todos feature folder to
handle the create actions:
Store/Features/Reducers/CreateTodoActionsReducer.cs
using Fluxor;
using StateManagementWithFluxor.Models.Todos.Dtos;
using StateManagementWithFluxor.Store.Features.Todos.Actions.CreateTodo;
using StateManagementWithFluxor.Store.State;
using System.Collections.Generic;
using System.Linq;

namespace StateManagementWithFluxor.Store.Features.Todos.Reducers
{
    public static class CreateTodoActionsReducer
    {
        [ReducerMethod]
        public static TodosState ReduceCreateTodoAction(TodosState state, CreateTodoAction _) =>
            new TodosState(true, null, state.CurrentTodos, state.CurrentTodo);

        [ReducerMethod]
        public static TodosState ReduceCreateTodoSuccessAction(TodosState state, CreateTodoSuccessAction action)
        {
            // Grab a reference to the current todo list, or initialize one if we do not currently have any loaded
            var currentTodos = state.CurrentTodos is null ?
                new List<TodoDto>() :
                state.CurrentTodos.ToList();

            // Add the newly created todo to our list and sort by ID
            currentTodos.Add(action.Todo);
            currentTodos = currentTodos
                .OrderBy(t => t.Id)
                .ToList();

            return new TodosState(false, null, currentTodos, state.CurrentTodo);
        }

        [ReducerMethod]
        public static TodosState ReduceCreateTodoFailureAction(TodosState state, CreateTodoFailureAction action) =>
            new TodosState(false, action.ErrorMessage, state.CurrentTodos, state.CurrentTodo);
    }
}
When an initial CreateTodoAction is dispatched, we set the TodoState with the loading property set to true and the
existing todos and selected todo, as we don't want to alter the current state those actions ultimately produce as our
create workflow has no concern with either workflow. Upon a successful creation, i.e. the API returning a successful 201
status code back to us, we'll produce a new TodosState by appending the newly created todo item to a copy of the
current list of todos, and set the sorted list within the constructor of the TodosState object. Finally, upon
a CreateTodoFailureAction being dispatched, we keep the currently loaded todos piece of state intact, making sure to
produce a new TodosState containing an error that we issued the failure action with.
With our reducer in place, we'll need to add a side effect (if you're a little fuzzy on the flux workflow, checkout the
first post) that will do the actual calling of the API using our JsonPlaceholderApiService and issue either a success,
or failure, action based on the response. In our Effects directory underneath our todos feature folder, let's add
a CreateTodoEffect.cs file:
CreateTodoEffect.cs
using Fluxor;
using Microsoft.Extensions.Logging;
using StateManagementWithFluxor.Models.Todos.Dtos;
using StateManagementWithFluxor.Services;
using StateManagementWithFluxor.Store.Features.Todos.Actions.CreateTodo;
using System;
using System.Net.Http;
using System.Net.Http.Json;
using System.Threading.Tasks;

namespace StateManagementWithFluxor.Store.Features.Todos.Effects.CreateTodo
{
    public class CreateTodoEffect : Effect<CreateTodoAction>
    {
        private readonly ILogger<CreateTodoEffect> _logger;
        private readonly JsonPlaceholderApiService _apiService;

        public CreateTodoEffect(ILogger<CreateTodoEffect> logger, JsonPlaceholderApiService httpClient) =>
            (_logger, _apiService) = (logger, httpClient);

        protected override async Task HandleAsync(CreateTodoAction action, IDispatcher dispatcher)
        {
            try
            {
                _logger.LogInformation($"Creating todo {action.Todo}...");
                var createResponse = await _apiService.PostAsync("todos", action.Todo);

                if (!createResponse.IsSuccessStatusCode)
                {
                    throw new HttpRequestException($"Error creating todo: {createResponse.ReasonPhrase}");
                }

                _logger.LogInformation("Todo created successfully!");
                var createdTodo = await createResponse.Content.ReadFromJsonAsync<TodoDto>();
                dispatcher.Dispatch(new CreateTodoSuccessAction(createdTodo));
            }
            catch (Exception e)
            {
                _logger.LogError($"Could not create todo, reason: {e.Message}");
                dispatcher.Dispatch(new CreateTodoFailureAction(e.Message));
            }
        }
    }
}
Nothing too out of the ordinary here, but let's do a quick code breakdown:
- We inject a logger and our API service from the DI container, using an expression-bodied tuple constructor (C# syntactic sugar)
- Using our API service, we call the
PostAsyncmethod passing in the todo from theCreateTodoActionpayload andawaitfor the response - If we get back a good looking 201, we'll go ahead and dispatch a
CreateTodoSuccessActionwith the todo response returned from the API as the payload - Upon any unchecked exceptions, or any non-successful status code returned from the server, we'll dispatch an error action with the corresponding error message from the exception
With our create workflow in place, let's go ahead and add our CreateTodoForm.razor component to our Todos.razor
page. In the markup section of Todos.razor, we'll replace the current markup with the following:
Todos.razor
<h3 class="text-center mb-3">Todos</h3>

@if (TodosState.Value.IsLoading)
{
    <div class="d-flex flex-row justify-content-center">
        <div class="spinner-border" role="status">
            <span class="sr-only">Loading...</span>
        </div>
    </div>
}
else if (TodosState.Value.HasCurrentErrors || TodosState.Value.CurrentTodos is null)
{
    <div class="d-flex flex-column align-items-center">
        <span class="py-2">Whoops! Looks like an issue occurred loading todos :(</span>
        <button class="btn btn-info py-2" @onclick="() => Facade.LoadTodos()">Reload Todos</button>
    </div>
}
else if (!TodosState.Value.CurrentTodos.Any())
{
    <CreateTodoForm />

    <div class="d-flex flex-column align-items-center mt-2">
        <span class="py-2">Looks like there's no todos...</span>
        <button class="btn btn-info py-2" @onclick="() => Facade.LoadTodos()">Reload Todos</button>
    </div>
}
else
{
    <CreateTodoForm />

    <table class="table table-hover mt-2">
        <thead>
            <tr class="text-center">
                <th scope="col">ID</th>
                <th scope="col">Title</th>
                <th scope="col">Completed</th>
                <th scope="col">User ID</th>
            </tr>
        </thead>
        <tbody>
            @foreach (var todo in TodosState.Value.CurrentTodos)
            {
                <tr style="cursor: pointer;" class="text-center" @onclick="() => NavigateToTodoDetail(todo.Id)">
                    <td>@todo.Id</td>
                    <td>@todo.Title</td>
                    <td>@todo.Completed</td>
                    <td>@todo.UserId</td>
                </tr>
            }
        </tbody>
    </table>
}
We've added a reference to our create todo form with the <CreateTodoForm /> markup component in this razor page, so
when we navigate to the page, we should see a simple form after the todos have been loaded from the API:
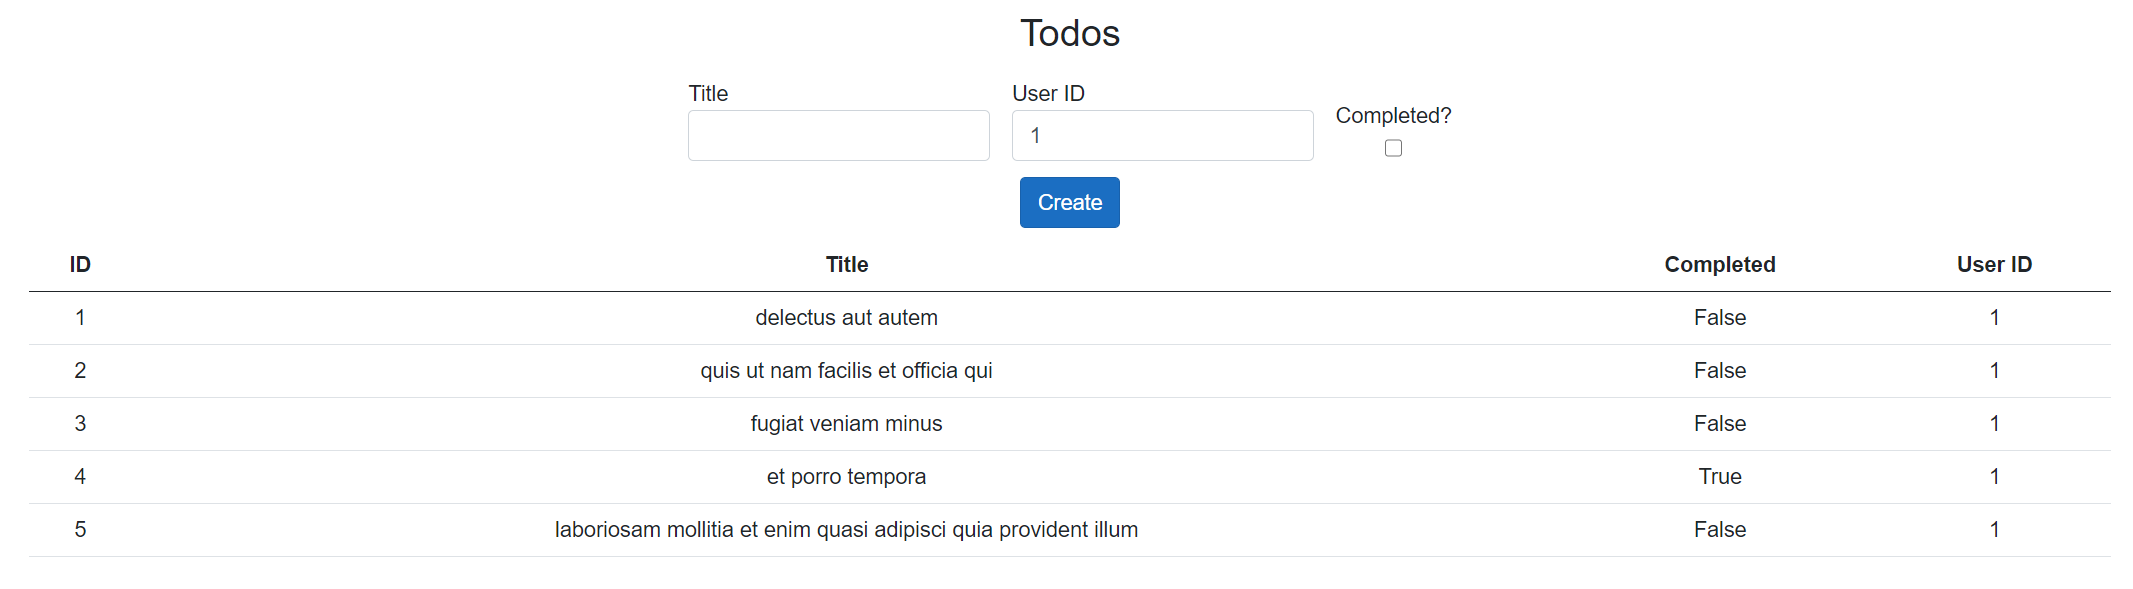
Notice we've added the <CreateTodoForm /> component in two sections of our markup, once when a rendered list is pulled
from the store, and again when there are no todos loaded available in state. With the help of Fluxor, we can easily
render these conditional pieces of markup based on our current state value, tapping into TodosState.Value to access
our properties we've added to that particular piece of state.
Internally, Fluxor
will call StateHasChanged for us when we have components descending from a FluxorComponent anytime the our store
published a new TodosState (triggered by the store), signaling Blazor to re-render the current markup based on our
new TodosState value. If you're familiar with Angular, StateHasChanged is the analog to the ChangeDetectorRef
service commonly utilized by Angular components that turn off automatic change detection
when ChangeDetectionStrategy.OnPush is used for that component's change detection strategy.
With our form in place, let's test our create workflow to make sure everything works as expected. With Redux Dev Tools
open in the dev console, let's go ahead and fire up our application. When it's up and running, navigate to the Todos
nav menu item, and we should a few actions fire off, namely the LoadTodosAction and the LoadTodosSuccessAction (
hopefully). Inspecting these actions, we can look at the action payloads, the current Todos state value, and the
computed diff between states once the action was dispatched. If we fill in some values for the create todo form on the
top of the page and hit the submit button, we should again see two more actions dispatched in the form
of CreateTodoAction carrying the form data we entered in the action payload, and a
corresponding CreateTodoSuccessAction computed state diff with an extra todo item added to the CurrentTodos property
state. The change should then be reflected in our table, since the store pushed out two corresponding TodosState
changes, causing Blazor to re-render its current markup twice and rendering the corresponding HTML based on the values
within our TodosState.
Updating todos
With our create workflow in place, let's iron out our update workflow. Since we've already put in place our retrieve
workflows, all we really need to do is add a bit code code to the TodoDetail.razor page to allow users to modify the
todo values when they've been selected from the todos table. To kick things off, let's add some actions for updating a
todo. In our Actions folder within our Todos feature folder, let's add an UpdateTodo folder. Inside that
directory, we'll add three actions corresponding to the kickoff, success, and failure actions:
UpdateTodoAction.cs
using StateManagementWithFluxor.Models.Todos.Dtos;

namespace StateManagementWithFluxor.Store.Features.Todos.Actions.UpdateTodo
{
    public class UpdateTodoAction
    {
        public UpdateTodoAction(int id, CreateOrUpdateTodoDto todo) =>
            (Id, Todo) = (id, todo);

        public int Id { get; }

        public CreateOrUpdateTodoDto Todo { get; }
    }
}
UpdateTodoSuccessAction.cs
using StateManagementWithFluxor.Models.Todos.Dtos;

namespace StateManagementWithFluxor.Store.Features.Todos.Actions.UpdateTodo
{
    public class UpdateTodoSuccessAction
    {
        public UpdateTodoSuccessAction(TodoDto todo) =>
            Todo = todo;

        public TodoDto Todo { get; }
    }
}
UpdateTodoFailureAction.cs
using StateManagementWithFluxor.Store.Features.Shared.Actions;

namespace StateManagementWithFluxor.Store.Features.Todos.Actions.UpdateTodo
{
    public class UpdateTodoFailureAction : FailureAction
    {
        public UpdateTodoFailureAction(string errorMessage)
            : base(errorMessage)
        {
        }
    }
}
Similar to our create workflow, we've allowed users to update todos using our CreateOrUpdateTodoDto class we created
to keep consistent with the properties they can use to create and update todos. With our actions in place, let's add the
corresponding reducer methods that will compute the state upon dispatch of these actions. In our Reducers folder,
let's add an UpdateTodoActionsReducer.cs class file:
UpdateTodoActionsReducer.cs
using Fluxor;
using StateManagementWithFluxor.Models.Todos.Dtos;
using StateManagementWithFluxor.Store.Features.Todos.Actions.UpdateTodo;
using StateManagementWithFluxor.Store.State;
using System.Collections.Generic;
using System.Linq;

namespace StateManagementWithFluxor.Store.Features.Todos.Reducers
{
    public static class UpdateTodoActionsReducer
    {
        [ReducerMethod]
        public static TodosState ReduceUpdateTodoAction(TodosState state, UpdateTodoAction _) =>
            new TodosState(true, null, state.CurrentTodos, state.CurrentTodo);

        [ReducerMethod]
        public static TodosState ReduceUpdateTodoSuccessAction(TodosState state, UpdateTodoSuccessAction action)
        {
            // If the current todos list is null, set the state with a new list containing the updated todo
            if (state.CurrentTodos is null)
            {
                return new TodosState(false, null, new List<TodoDto> { action.Todo }, state.CurrentTodo);
            }

            // Rather than mutating in place, let's construct a new list and add our updated item
            var updatedList = state.CurrentTodos
                .Where(t => t.Id != action.Todo.Id)
                .ToList();

            // Add the todo and sort the list
            updatedList.Add(action.Todo);
            updatedList = updatedList
                .OrderBy(t => t.Id)
                .ToList();

            return new TodosState(false, null, updatedList, null);
        }

        [ReducerMethod]
        public static TodosState ReduceUpdateTodoFailureAction(TodosState state, UpdateTodoFailureAction action) =>
            new TodosState(false, action.ErrorMessage, state.CurrentTodos, state.CurrentTodo);
    }
}
Nothing too exciting with our ReduceUpdateTodoAction and ReduceUpdateTodoFailureAction state reducers, as they
simply compute a new TodosState based on the action payload. Upon a successful update action being dispatched,
our ReduceUpdateTodoSuccessAction will create a new list based on the CurrentTodos values, excluding the value we've
updated, add the updated todo from the UpdateTodoSuccessAction payload, and create a new TodosState with this new
list. Again, we probably wouldn't do this in a real world production application, where we might opt instead to recall
the API to rehydrate the current list view.
With our reducer in place, let's add a couple side effects for the UpdateTodoAction and UpdateTodoSuccessAction
being dispatched. In our Effects folder, let's add an UpdateTodo subfolder with two effects, UpdateTodoEffect.cs
and UpdateTodoSuccessEffect.cs:
UpdateTodoEffect.cs
using Fluxor;
using Microsoft.Extensions.Logging;
using StateManagementWithFluxor.Models.Todos.Dtos;
using StateManagementWithFluxor.Services;
using StateManagementWithFluxor.Store.Features.Todos.Actions.UpdateTodo;
using System;
using System.Net.Http;
using System.Net.Http.Json;
using System.Threading.Tasks;

namespace StateManagementWithFluxor.Store.Features.Todos.Effects.UpdateTodoEffect
{
    public class UpdateTodoEffect : Effect<UpdateTodoAction>
    {
        private readonly ILogger<UpdateTodoEffect> _logger;
        private readonly JsonPlaceholderApiService _apiService;

        public UpdateTodoEffect(ILogger<UpdateTodoEffect> logger, JsonPlaceholderApiService httpClient) =>
            (_logger, _apiService) = (logger, httpClient);

        protected override async Task HandleAsync(UpdateTodoAction action, IDispatcher dispatcher)
        {
            try
            {
                _logger.LogInformation($"Updating todo {action.Id}...");
                var updateResponse = await _apiService.PutAsync($"todos/{action.Id}", action.Todo);

                if (!updateResponse.IsSuccessStatusCode)
                {
                    throw new HttpRequestException($"Error updating todo: {updateResponse.ReasonPhrase}");
                }

                _logger.LogInformation("Todo updated successfully!");
                var updatedTodo = await updateResponse.Content.ReadFromJsonAsync<TodoDto>();
                dispatcher.Dispatch(new UpdateTodoSuccessAction(updatedTodo));
            }
            catch (Exception e)
            {
                _logger.LogError($"Could not update todo, reason: {e.Message}");
                dispatcher.Dispatch(new UpdateTodoFailureAction(e.Message));
            }
        }
    }
}
UpdateTodoSuccessEffect.cs
using Fluxor;
using Microsoft.AspNetCore.Components;
using Microsoft.Extensions.Logging;
using StateManagementWithFluxor.Store.Features.Todos.Actions.UpdateTodo;
using System.Threading.Tasks;

namespace StateManagementWithFluxor.Store.Features.Todos.Effects.UpdateTodoEffect
{
    public class UpdateTodoSuccessEffect : Effect<UpdateTodoSuccessAction>
    {
        private readonly ILogger<UpdateTodoSuccessEffect> _logger;
        private readonly NavigationManager _navigation;

        public UpdateTodoSuccessEffect(ILogger<UpdateTodoSuccessEffect> logger, NavigationManager navigation) =>
            (_logger, _navigation) = (logger, navigation);

        protected override Task HandleAsync(UpdateTodoSuccessAction action, IDispatcher dispatcher)
        {
            _logger.LogInformation("Updated todo successfully, navigating back to todo listing...");
            _navigation.NavigateTo("todos");

            return Task.CompletedTask;
        }
    }
}
Our UpdateTodoEffect.cs utilizes our JsonPlaceholderApiService to make a PUT call to the API using the action's
payload (our CreateOrUpdateTodoDto object), and issues an update success action upon a successful response from the
API. In our UpdateTodoSuccessEffect, we navigate the user back to the todos page, where the list should now display
the updated values we've just entered and submitted on the todo details form. We choose to navigate users back to the
todos page only on a successful action dispatched, rather than navigating users back regardless, as we want to inform
users of unexpected errors while still on the details page before navigating back to the page. We're also controlling
the user's navigation, building in predictable UX for the user rather than having them navigate back manually, or
navigating else where in our application that we might not expect during this workflow.
With our core flux workflow in place for the update actions, let's add a method to our StateFacade so that we can
issue these actions from our TodosDetail.razor page. In our StateFacade service:
StateFacade.cs
// Previously existing imported namespaces...
using StateManagementWithFluxor.Store.Features.Todos.Actions.UpdateTodo;

namespace StateManagementWithFluxor.Services
{
    public class StateFacade
    {
        // Previous facade methods...

        public void UpdateTodo(int id, string title, bool completed, int userId)
        {
            // Construct our validated todo
            var todoDto = new CreateOrUpdateTodoDto(title, completed, userId);

            _logger.LogInformation($"Issuing action to update todo {id}");
            _dispatcher.Dispatch(new UpdateTodoAction(id, todoDto));
        }
    }
}
With our UpdateTodo facade method in place, let's finally add to the markup in TodoDetail.razor to dispatch the
update action and allow users to modify the currently selected todo values:
TodoDetail.razor
@inherits Fluxor.Blazor.Web.Components.FluxorComponent

@page "/todos/{todoId}"

@using StateManagementWithFluxor.Models.Todos.Validation
@using StateManagementWithFluxor.Store.State
@using StateManagementWithFluxor.Services

@inject IState<TodosState> TodosState
@inject StateFacade Facade

<h3 class="text-center mb-3">Detail for todo item @TodoId</h3>

@if (TodosState.Value.IsLoading)
{
    <div class="d-flex flex-row justify-content-center">
        <div class="spinner-border" role="status">
            <span class="sr-only">Loading...</span>
        </div>
    </div>
}
else if (TodosState.Value.HasCurrentErrors || TodosState.Value.CurrentTodo is null)
{
    <div class="d-flex flex-column align-items-center">
        <span>Whoops! Looks like an issue occurred loading todos :(</span>
        <div class="py-3">
            <a class="btn btn-primary" href="/todos">Back to Todos</a>
        </div>
    </div>
}
else
{
    <EditForm Model="validationModel" OnValidSubmit="HandleValidSubmit">
        <DataAnnotationsValidator />
        <div class="d-flex flex-column align-items-center">
            <ValidationSummary />
        </div>

        <div class="d-flex flex-column align-items-center py-1">
            <div class="d-flex flex-row py-2">
                <strong>ID</strong>: @TodosState.Value.CurrentTodo.Id
            </div>
            <div class="py-2 d-flex flex-row align-items-center">
                <strong class="px-2">Completed:</strong>
                <InputCheckbox class="form-check" @bind-Value="validationModel.Completed" />
            </div>
            <div class="py-2 d-flex flex-row align-items-center">
                <strong class="px-2">User:</strong>
                <InputNumber class="form-control" @bind-Value="validationModel.UserId"/>
            </div>
            <div class="py-2 d-flex flex-row align-items-center">
                <strong class="px-2">Title:</strong>
                <InputText class="form-control" @bind-Value="validationModel.Title"/>
            </div>

            <div class="d-flex flex-row justify-content-center pt-2">
                <button type="submit" class="btn btn-secondary">Update</button>
                <span class="px-2"></span>
                <button class="btn btn-danger">Delete</button>
            </div>

            <div class="py-3">
                <a class="btn btn-primary" href="/todos">Back to Todos</a>
            </div>
        </div>
    </EditForm>

}

@code {

    private CreateOrUpdateTodoValidationModel validationModel = new CreateOrUpdateTodoValidationModel();

    [Parameter]
    public string? TodoId { get; set; }

    protected override void OnInitialized()
    {
        // Load the todo detail on initial page navigation
        if (int.TryParse(TodoId, out var parsedId))
        {
            Facade.LoadTodoById(parsedId);
        }

        // Register a state change to assign the validation fields
        TodosState.StateChanged += (sender, state) =>
        {
            if (state.CurrentTodo is null)
            {
                return;
            }

            validationModel.Title = state.CurrentTodo.Title;
            validationModel.Completed = state.CurrentTodo.Completed;
            validationModel.UserId = state.CurrentTodo.UserId;

            StateHasChanged();
        };

        base.OnInitialized();
    }

    protected override void Dispose(bool disposing)
    {
        base.Dispose(disposing);
    }

    private void HandleValidSubmit()
    {
        // We use the bang operator (!) to tell the compiler we'll know this string field will not be null
        Facade.UpdateTodo(TodosState.Value.CurrentTodo!.Id, validationModel.Title!, validationModel.Completed, validationModel.UserId);
    }

}
Since we've changed quite a few things in this detail page, let's do a quick code breakdown:
- First, we've added an
EditFormto handle validating the user's input when updating values similar to how we've setup ourCreateTodoForm.razorcomponent - We've added a
CreateOrUpdateTodoValidationModelvalidation model that will react to user input and display any validation errors with the help of the<DataAnnotationsValidator />and<ValidationSummary />built-in Blazor components - We've modified our
OnInitializedlifecycle method to react to state changes so we can reassign the validation model fields from the current todo fields and trigger an additionalStateHasChanged()event to tell Blazor to re-render the markup to reflect these changes within the inputs of the form - Since we're subscribing to additional state changes outside of the scope of Fluxor, we need make sure to manually dispose of our component to avoid memory leaks; again, if you're familiar with Angular, this is similar to destroying your observable subscriptions when a component is disposed
- Upon a valid submit, we'll issue the
UpdateTodofacade method that will dispatch theUpdateTodoActionand kickoff the update workflow
Awesome, now that our todo detail page has been updated, if we select a todo from the todos table, we should now be able to update that particular todo's values and see those changes reflected back in the table once we hit submit (and the API responds successfully). I'll leave it as an exercise for the reader to see what actions are dispatched in the Redux Dev Tools console panel and inspect the actions, payloads, and diffs that are computed.
Deleting todos
With the light at the end of the tunnel now within sight, we just need to add one more workflow to delete todos.
Thankfully, most of the internal plumbing we've already done, so we'll only have to hookup the delete actions to the
delete button we've added to our detail page. Let's start by adding a DeleteTodos folder within our Actions
directory, with three actions in DeleteTodoAction.cs, DeleteTodoSuccessAction.cs, DeleteTodoFailureAction.cs:
DeleteTodoAction.cs
namespace StateManagementWithFluxor.Store.Features.Todos.Actions.DeleteTodo
{
    public class DeleteTodoAction
    {
        public DeleteTodoAction(int id) =>
            Id = id;

        public int Id { get; }
    }
}
DeleteTodoSuccessAction.cs
namespace StateManagementWithFluxor.Store.Features.Todos.Actions.DeleteTodo
{
    public class DeleteTodoSuccessAction
    {
        public DeleteTodoSuccessAction(int id) =>
            Id = id;

        public int Id { get; }
    }
}
DeleteTodoFailureAction.cs
using StateManagementWithFluxor.Store.Features.Shared.Actions;

namespace StateManagementWithFluxor.Store.Features.Todos.Actions.DeleteTodo
{
    public class DeleteTodoFailureAction : FailureAction
    {
        public DeleteTodoFailureAction(string errorMessage)
            : base(errorMessage)
        {
        }
    }
}
From the above actions, we see that we're simply only transporting the todo ID in the kickoff and success action
payloads, as we only need a reference to the ID to remove the todo from our list. While it might be tempting to reuse
the kickoff and success actions as they are effectively the same class, the overhead of adding actions is rather small
and doesn't add much complexity. If our requirements change, maybe the business analysts want a message transmitted upon
a successful delete, we'll only be refactoring a single action sub-workflow (the success flow for the delete todo
workflow) with zero fear of unintentionally breaking the kickoff sub-workflow. With our actions in place, let's add our
last reducer in our Reducers folder with DeleteTodoActionsReducer.cs:
DeleteTodoActionsReducer.cs
using Fluxor;
using StateManagementWithFluxor.Store.Features.Todos.Actions.DeleteTodo;
using StateManagementWithFluxor.Store.State;
using System.Linq;

namespace StateManagementWithFluxor.Store.Features.Todos.Reducers
{
    public static class DeleteTodoActionsReducer
    {
        [ReducerMethod]
        public static TodosState ReduceDeleteTodoAction(TodosState state, DeleteTodoAction _) =>
            new TodosState(true, null, state.CurrentTodos, state.CurrentTodo);

        [ReducerMethod]
        public static TodosState ReduceDeleteTodoSuccessAction(TodosState state, DeleteTodoSuccessAction action)
        {
            // Return the default state if no list of todos is found
            if (state.CurrentTodos is null)
            {
                return new TodosState(false, null, null, state.CurrentTodo);
            }

            // Create a new list with all todo items excluding the todo with the deleted ID
            var updatedTodos = state.CurrentTodos.Where(t => t.Id != action.Id);

            return new TodosState(false, null, updatedTodos, state.CurrentTodo);
        }

        [ReducerMethod]
        public static TodosState ReduceDeleteTodoFailureAction(TodosState state, DeleteTodoFailureAction action) =>
            new TodosState(false, action.ErrorMessage, state.CurrentTodos, state.CurrentTodo);
    }
}
Again, nothing special with our ReduceDeleteTodoAction and ReduceDeleteTodoFailureAction, as they're simply just
computing action-based stated. With our ReduceDeleteTodoSuccessAction, we grab a reference to a list with the help of
LINQ containing all todos excluding the todo who's ID matches the ID from the issued action. Using this newly created
list, we'll create a new TodosState using this list and notify our components. With our reducer in place, let's add a
few side effects to help with calling the API with DeleteTodoEffect.cs and DeleteTodoSuccessEffect.cs. In
our Effects folder, let's add a DeleteTodos subfolder with the following classes:
DeleteTodoEffect.cs
using Fluxor;
using Microsoft.Extensions.Logging;
using StateManagementWithFluxor.Services;
using StateManagementWithFluxor.Store.Features.Todos.Actions.DeleteTodo;
using System;
using System.Net.Http;
using System.Threading.Tasks;

namespace StateManagementWithFluxor.Store.Features.Todos.Effects.DeleteTodo
{
    public class DeleteTodoEffect : Effect<DeleteTodoAction>
    {
        private readonly ILogger<DeleteTodoEffect> _logger;
        private readonly JsonPlaceholderApiService _apiService;

        public DeleteTodoEffect(ILogger<DeleteTodoEffect> logger, JsonPlaceholderApiService apiService) =>
            (_logger, _apiService) = (logger, apiService);

        protected override async Task HandleAsync(DeleteTodoAction action, IDispatcher dispatcher)
        {
            try
            {
                _logger.LogInformation($"Deleting todo {action.Id}...");
                var deleteResponse = await _apiService.DeleteAsync($"todos/{action.Id}");

                if (!deleteResponse.IsSuccessStatusCode)
                {
                    throw new HttpRequestException($"Error deleting todo: {deleteResponse.ReasonPhrase}");
                }

                _logger.LogInformation($"Todo deleted successfully!");
                dispatcher.Dispatch(new DeleteTodoSuccessAction(action.Id));
            }
            catch (Exception e)
            {
                _logger.LogError($"Could not create todo, reason: {e.Message}");
                dispatcher.Dispatch(new DeleteTodoFailureAction(e.Message));
            }
        }
    }
}
DeleteTodoSuccessEffect.cs
using Fluxor;
using Microsoft.AspNetCore.Components;
using Microsoft.Extensions.Logging;
using StateManagementWithFluxor.Store.Features.Todos.Actions.DeleteTodo;
using System.Threading.Tasks;

namespace StateManagementWithFluxor.Store.Features.Todos.Effects
{
    public class DeleteTodoSuccessEffect : Effect<DeleteTodoSuccessAction>
    {
        private readonly ILogger<DeleteTodoSuccessEffect> _logger;
        private readonly NavigationManager _navigation;

        public DeleteTodoSuccessEffect(ILogger<DeleteTodoSuccessEffect> logger, NavigationManager navigation) =>
            (_logger, _navigation) = (logger, navigation);

        protected override Task HandleAsync(DeleteTodoSuccessAction action, IDispatcher dispatcher)
        {
            _logger.LogInformation("Deleted todo successfully, navigating back to todo listing...");
            _navigation.NavigateTo("todos");

            return Task.CompletedTask;
        }
    }
}
With our DeleteTodoEffect, we setup an eerily similar workflow to our other issued actions, simply using our API
service to call the DELETE endpoint with the ID from the action's payload. On a successful response we'll issue the
success action that will trigger the DeleteTodoSuccessEffect to fire off, navigating the user back to the todos page
with a new version of the table without the todo we just deleted. Again, we use effects as a form of navigation control
to selectively guide users around our application in a predicable manner. With our effects in place, let's add a facade
method to help facilitate the dispatching of the delete actions from our components. Back in our StateFacade service:
StateFacade.cs
// Previously existing imported namespaces...
using StateManagementWithFluxor.Store.Features.Todos.Actions.DeleteTodo;

namespace StateManagementWithFluxor.Services
{
    public class StateFacade
    {
        // Previous facade methods...

        public void DeleteTodo(int id)
        {
            _logger.LogInformation($"Issuing action to delete todo {id}");
            _dispatcher.Dispatch(new DeleteTodoAction(id));
        }
    }
}
With our facade method in place, let's finally add the interaction to the delete button on our todo detail page with
just a simple @onclick event handler within our EditForm markup block:
TodoDetail.razor
<EditForm Model="validationModel" OnValidSubmit="HandleValidSubmit">
    <DataAnnotationsValidator />
    <div class="d-flex flex-column align-items-center">
        <ValidationSummary />
    </div>

    <div class="d-flex flex-column align-items-center py-1">
        <div class="d-flex flex-row py-2">
            <strong>ID</strong>: @TodosState.Value.CurrentTodo.Id
        </div>
        <div class="py-2 d-flex flex-row align-items-center">
            <strong class="px-2">Completed:</strong>
            <InputCheckbox class="form-check" @bind-Value="validationModel.Completed" />
        </div>
        <div class="py-2 d-flex flex-row align-items-center">
            <strong class="px-2">User:</strong>
            <InputNumber class="form-control" @bind-Value="validationModel.UserId"/>
        </div>
        <div class="py-2 d-flex flex-row align-items-center">
            <strong class="px-2">Title:</strong>
            <InputText class="form-control" @bind-Value="validationModel.Title"/>
        </div>

        <div class="d-flex flex-row justify-content-center pt-2">
            <button type="submit" class="btn btn-secondary">Update</button>
            <span class="px-2"></span>
            <button class="btn btn-danger" @onclick="() => Facade.DeleteTodo(TodosState.Value.CurrentTodo.Id)">Delete</button>
        </div>

        <div class="py-3">
            <a class="btn btn-primary" href="/todos">Back to Todos</a>
        </div>
    </div>
</EditForm>
Notice we've only just added the @onclick="() => Facade.DeleteTodo(TodosState.Value.CurrentTodo.Id)" event handler to
the delete button to fire off the initial delete action based on the ID of the currently displayed todo.
Whew... that was quite a bit of code. Let's sit back and enjoy the fruits of our labor and test out the delete workflow.
If we navigate to the todos page to see the list of displayed todos, go ahead and select a todo. Once we're navigated to
the detail page, with the Redux Dev tools console open, go ahead and hit the delete button. What actions do we see
issued in the console? Checkout the diffs and the action payloads for a little extra credit. Once we see
the DeleteTodoSuccessAction issued, we're navigated back to our todos page and see the table has been updated to
reflect the removal of our todo! Pretty cool, huh?
Wrapping up
In the final stretch, we've seen one strategy for implementing CRUD workflows with the help of Fluxor in our Blazor applications. Bringing the redux experience to Blazor empowers us .NET developers to build bulletproof and predictable Blazor applications simplifying the complex problem of state management on the frontend, bringing a tried-and-true design patter in flux along with us. Feel free to play around with the code we've written so far, and maybe even improve the workflows we already have set in place (see what happens when you reload the todo detail with a selected todo and try to delete it). All the code we've written so far is available on GitHub for those following along. Next up, we'll explore automated integration testing on our todos application using Cypress to help further strengthen our codebase and provide yet another tool we can bring into the development process to assist with bulletproofing our workflows, along with a few considerations and potential refactors we could make with our current application architecture to make it a bit more robust.
Until next time, friends!